Email Synchronisation Instructions
for TriSys SmartClient Users
Should you have any questions please raise a support issue using the TriSys customer support portal.
The TriSys Cloud Sync email synchronisation service automatically copies sent/received e-mails into the corresponding database contact records containing matching email addresses. Please note email addresses which do not exist in your TriSys database will not synchronise any sent/received emails. To ensure such emails synchronise you must ensure such email addresses exist in your TriSys database.
Please complete the following steps to enable this service
Step 1 - Click the ribbon tab "Tools > User Options"

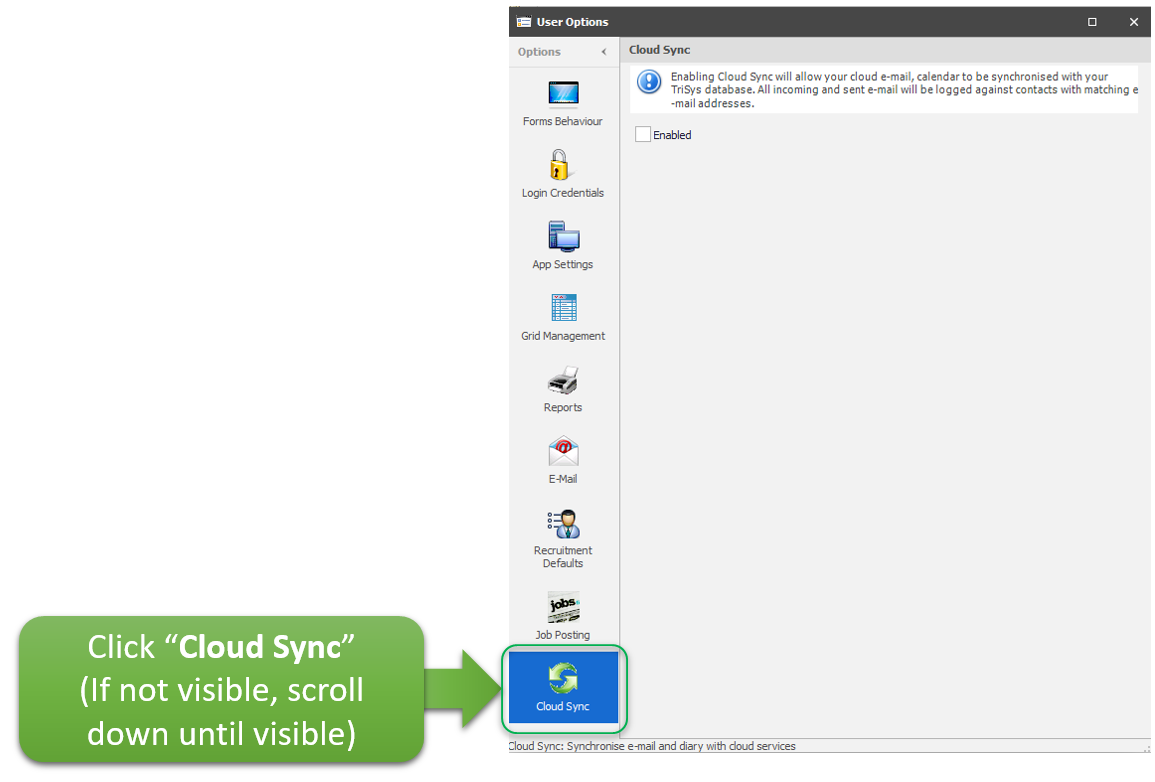
Step 2 - Click the button "Cloud Sync" (if not visible scroll down until visible)
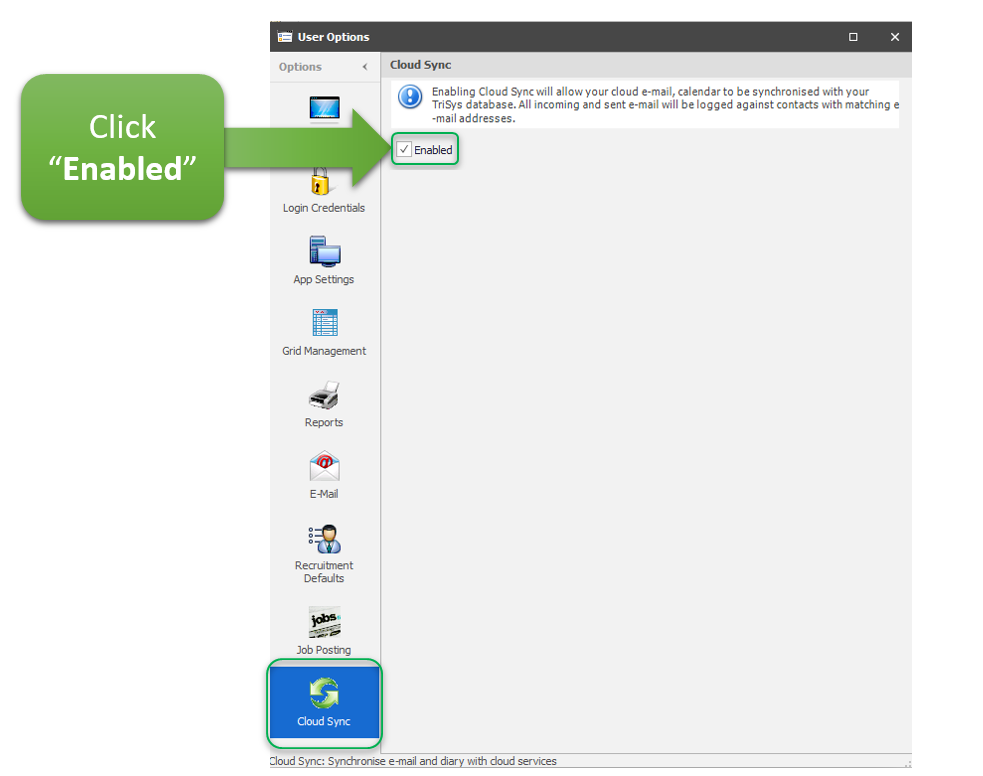
Step 3 - Click the checkbox "Enabled" (if already showing as enabled skip to the next step)
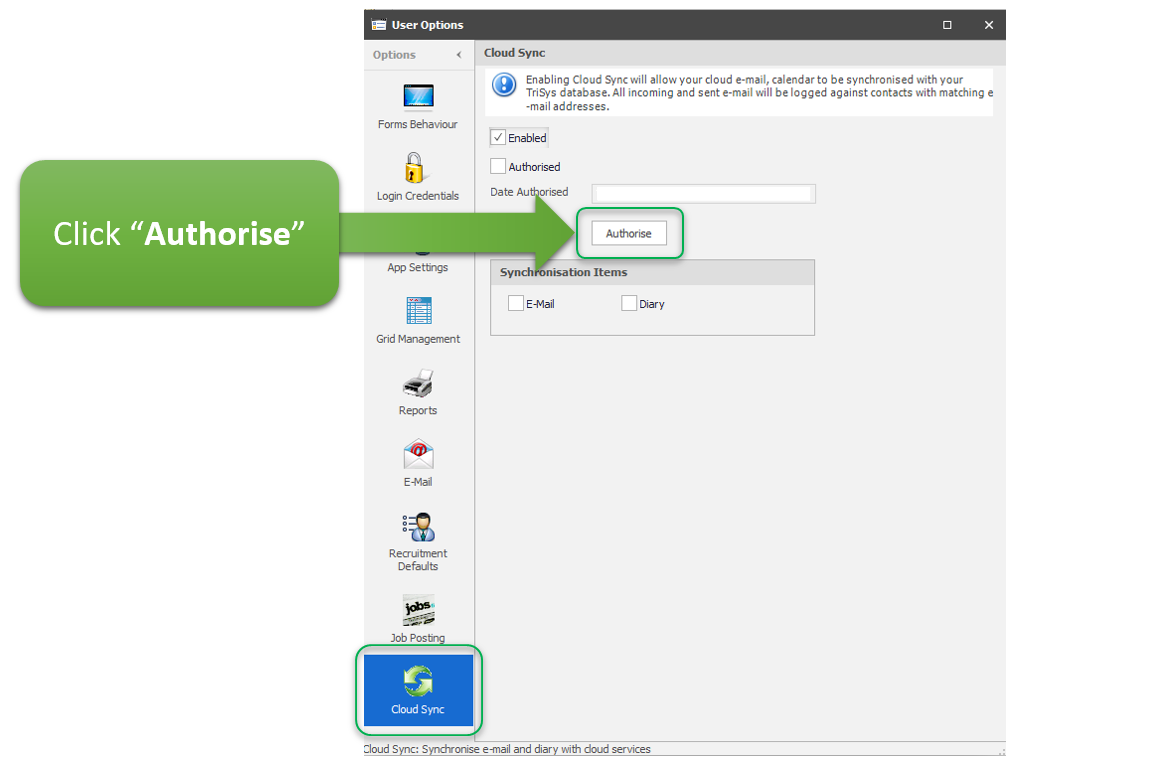
Step 4 - Click the button "Authorise" even if "Authorised" is already showing. Once you click the "Authorise" button a window will open.
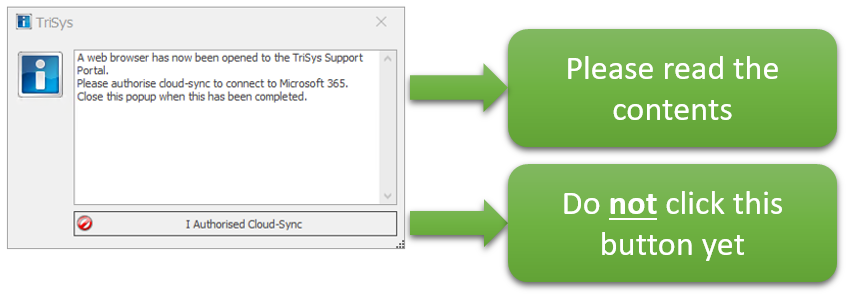
Step 5 - A window will open containing instructions (please follow the instructions and do not click the button until you have completed all steps below)
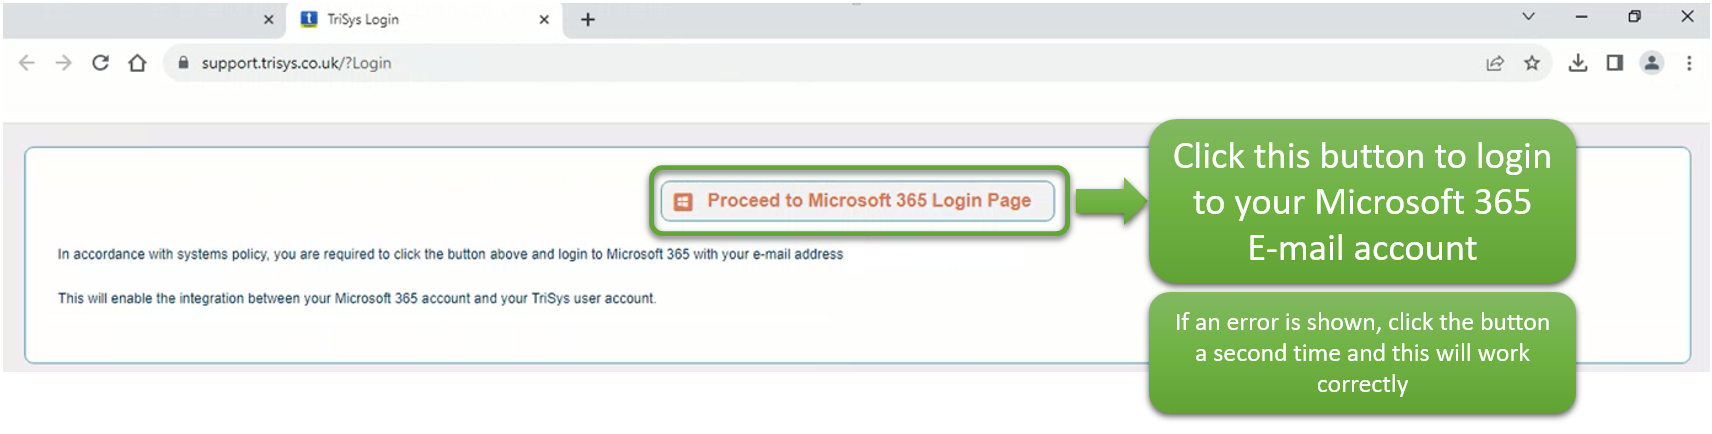
Step 6 - In the web browser window which has automatically opened, click the button "Proceed to Microsoft 365 Login Page" (if the browser window below is not visible, open your web browser where the window will be waiting for your input/action as shown).
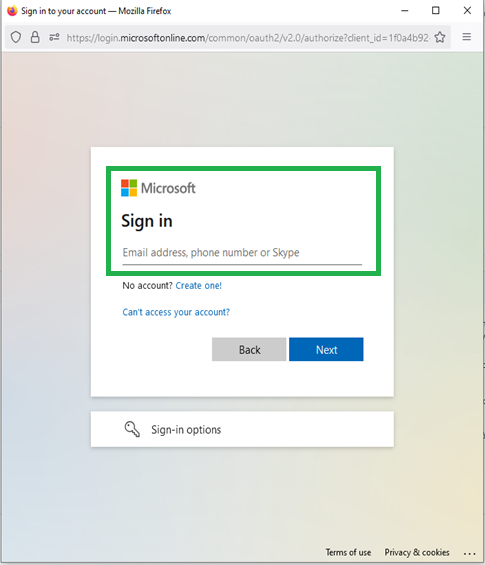
Step 7 - In the window which has opened, login to your email account (using your email address and email account password, not your TriSys password)
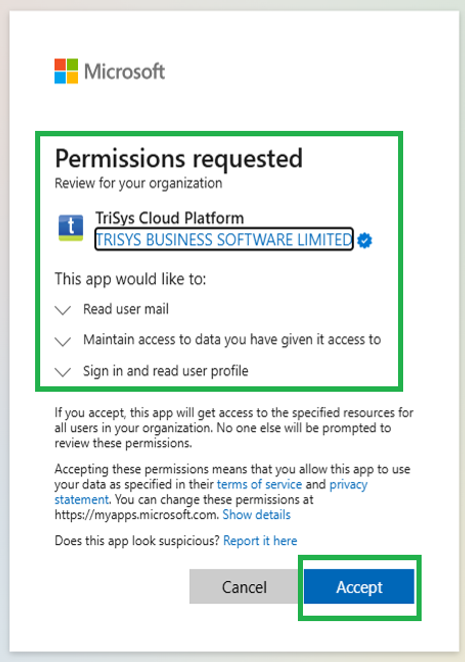
Step 8 - Click "Accept" (should there be a checkbox to click, please do so and then click "Accept")
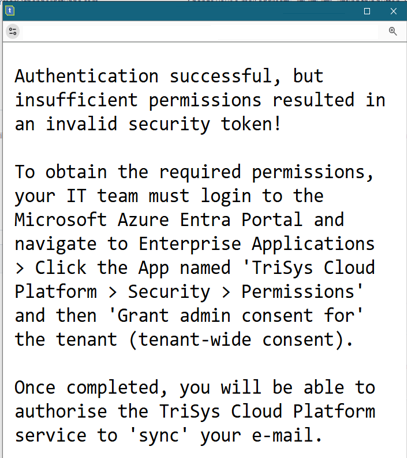
Step 9 - In the event that the following message is displayed, please skip to "Instructions for your IT Support Team" (see below)
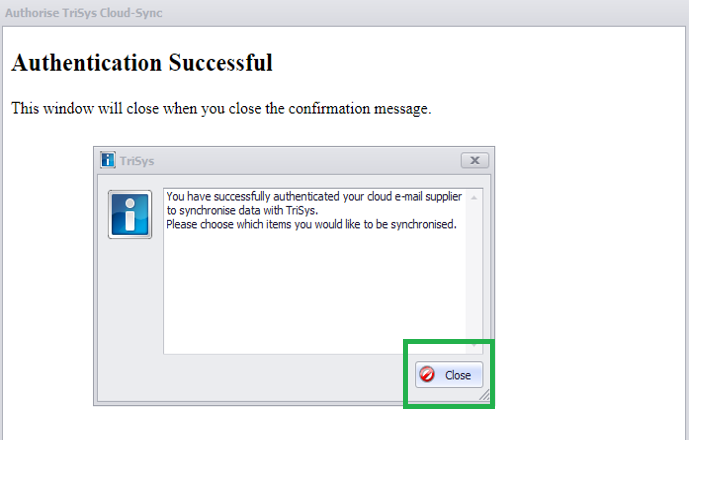
Step 10 - Should you see a web page showing the message "Authentication Successful" you may close the confirmation window.
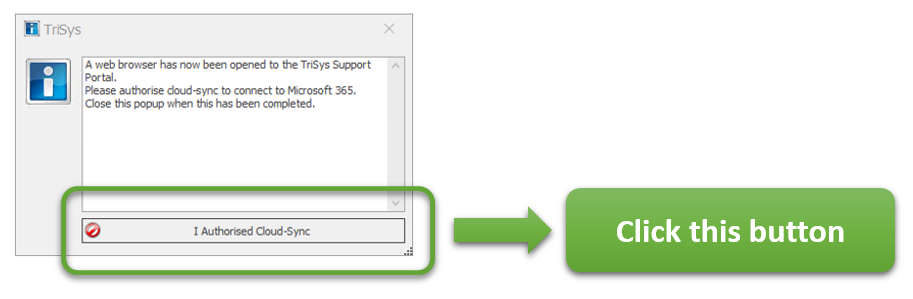
Step 11 - You may now return to the TriSys application (which may have been minimised whilst you have completed the above steps) and click the button:
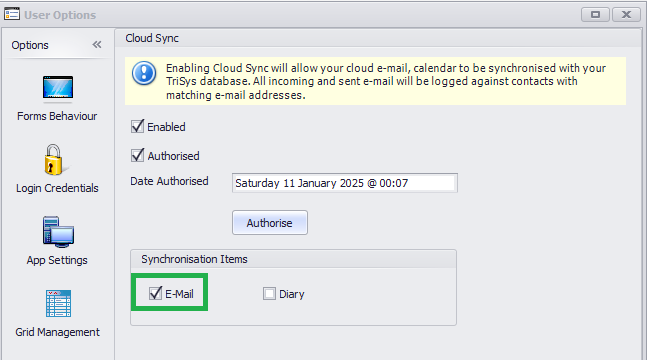
Step 12 - In the User Options window, ensure synchronisation is enabled for "Email"
Step 13 - Close the User Options window. You may resume your normal use of TriSys.

Success
You have successfully completed the activation of this service.
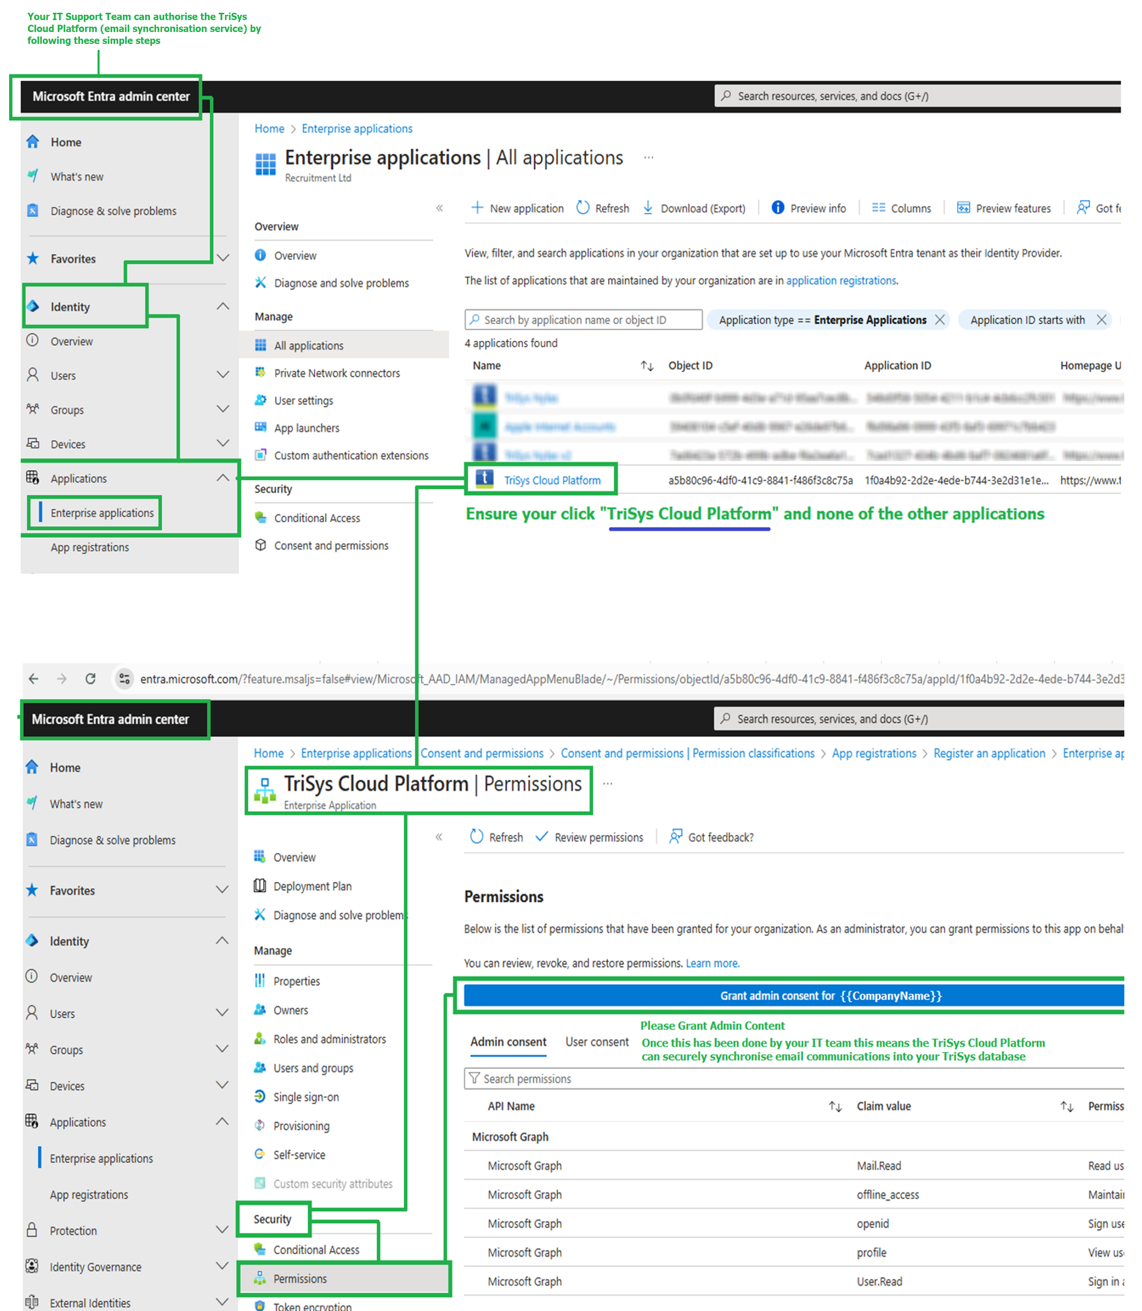
Below are the instructions which your IT support team can refer to (if applicable).
Insufficient Permissions?
Should you encounter the message below when following the instructions above you must contact your IT support team (please send them a link to this page and request that the instructions below are followed specifically
"Configuration Required in Microsoft Entra"
Configuration Required in Microsoft Entra (instructions for your IT support team)
Your specialist IT support team must follow the steps below once.
After this has been completed please repeat the above instructions from Step 1 to successfully activate your e-mail synchronisation service.