

Email and Diary Synchronisation Instructions
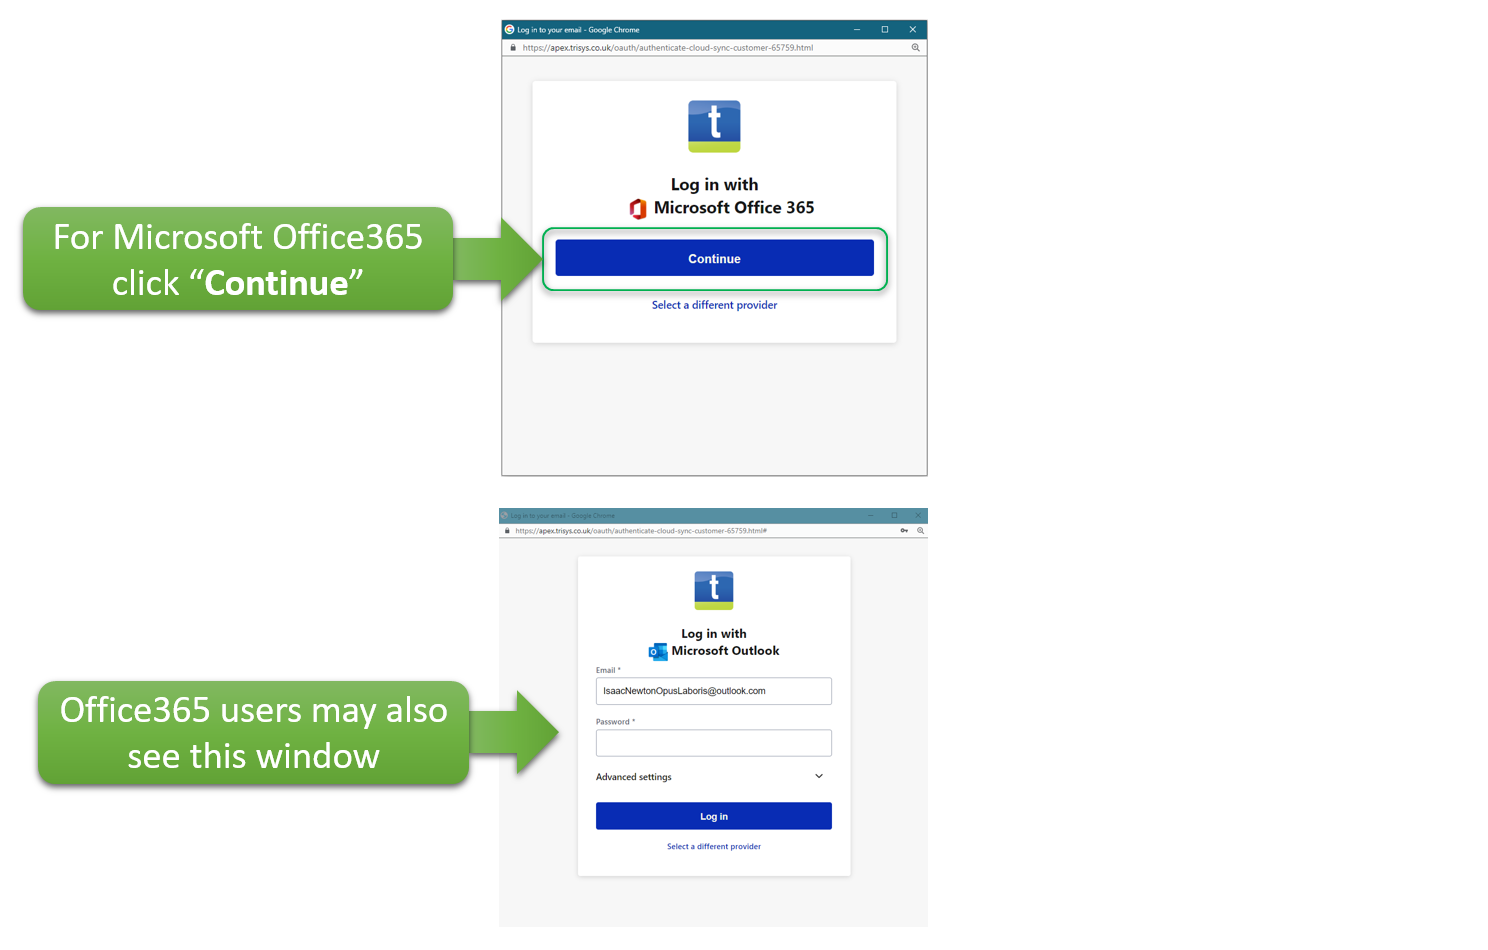
(Applicable to TriSys SmartClient and Office365 Customers)
Should you have any questions please raise a support issue using the TriSys customer support portal.
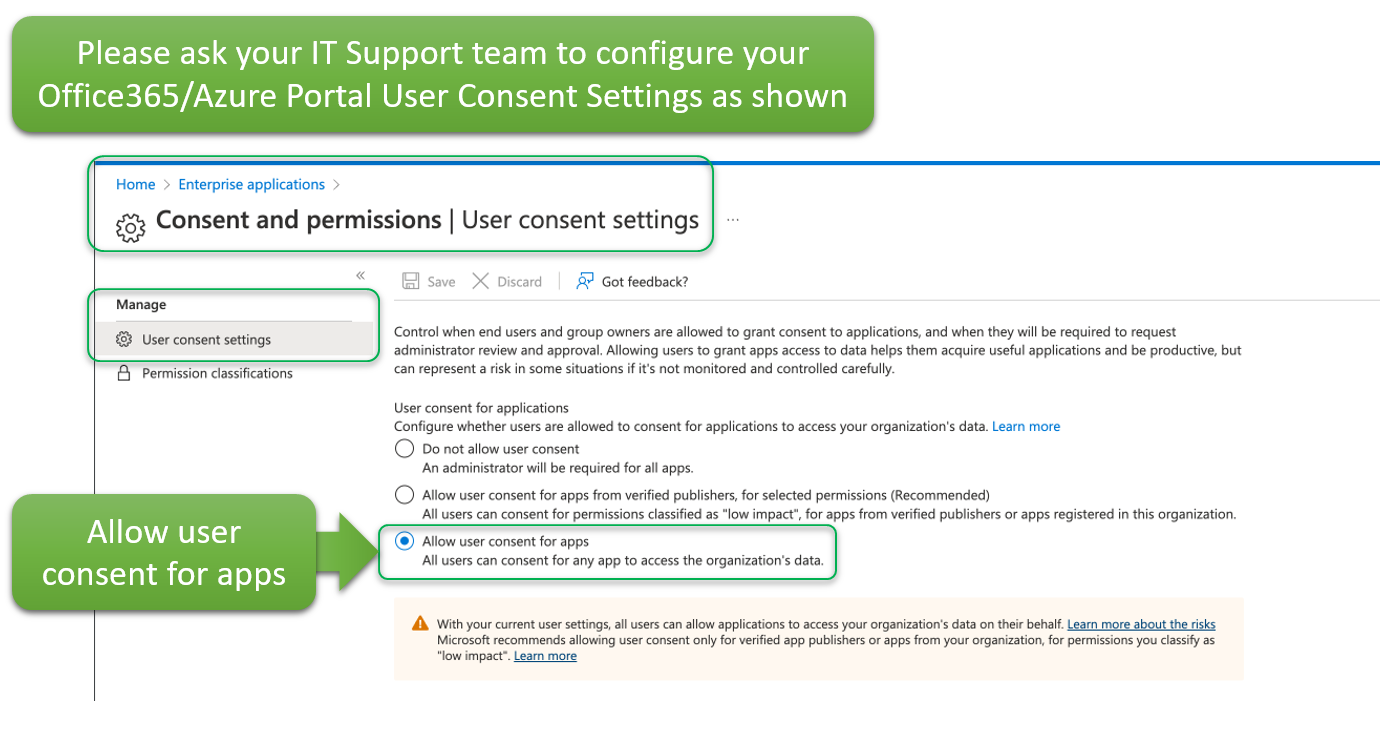
Please contact your business IT Support team requesting that they allow the TriSys E-Mail and Diary Synchronisation service to be enabled by each user.
This is done directly within the Microsoft Office365 administration center or Microsoft Azure Portal if applicable, by your IT support team, ensuring that users can seamlessly enable the synchronisation service as described in the steps below.
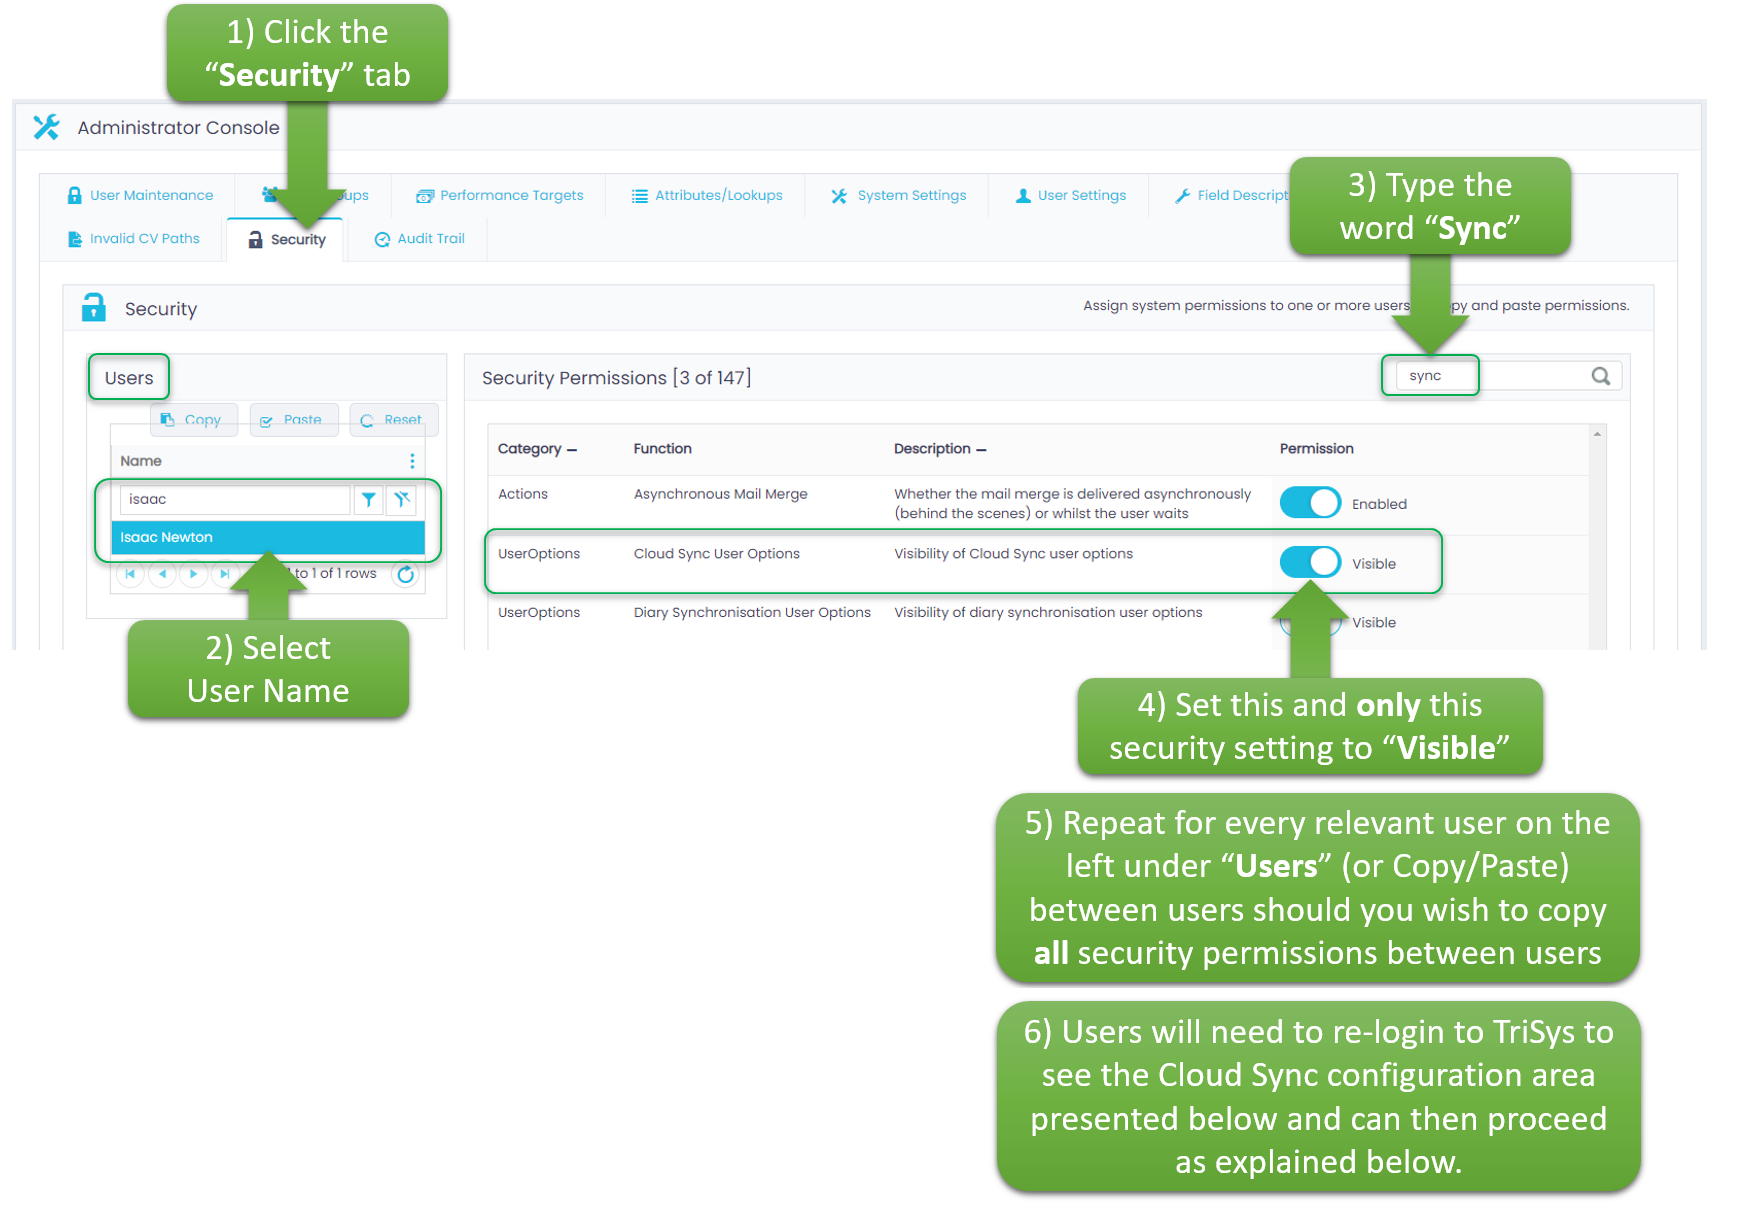
Should you be the TriSys database administrator user, you must firstly ensure that every user who requires the use of e-mail and/or diary synchronisation has visibility over the configuration of this service. This per-user visibility configuration is explained in the image below.
Should you not be the TriSys database administrator user, please skip the image below and proceed with the additional instructions.
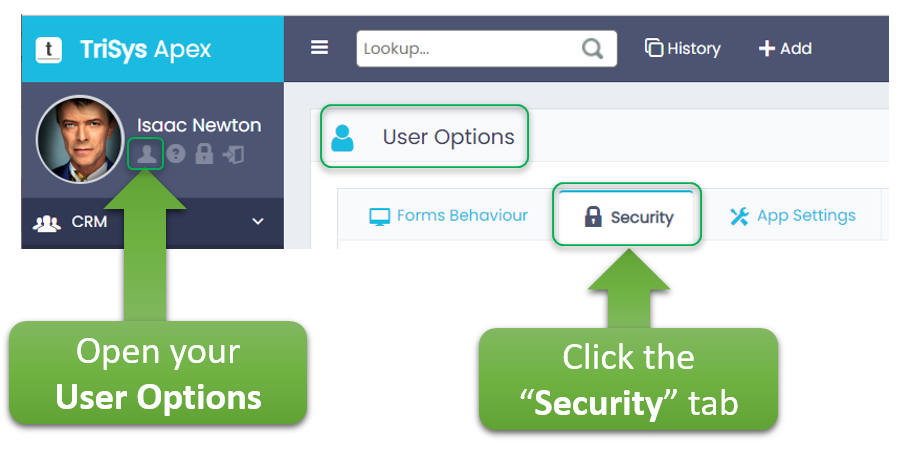
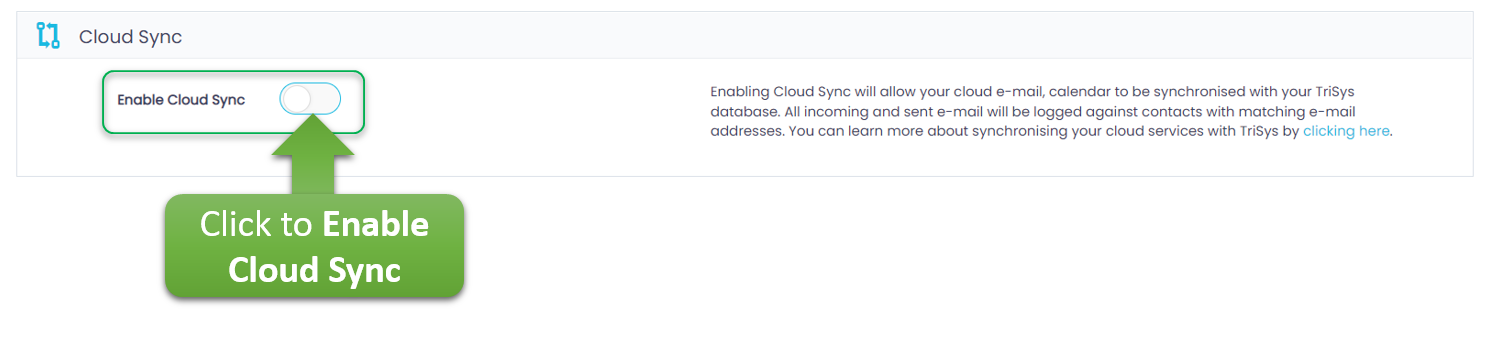
Scroll down until you reach the following area: "Cloud Sync" where you will enable the Cloud Sync service as shown (should you not have the "Cloud Sync" area below visible, you must contact your TriSys database administrator user and request that you are permissioned to view the Cloud Sync configuration options shown below). You will be unable to proceed until your TriSys database administrator configures visibility of Cloud Sync for your user login.

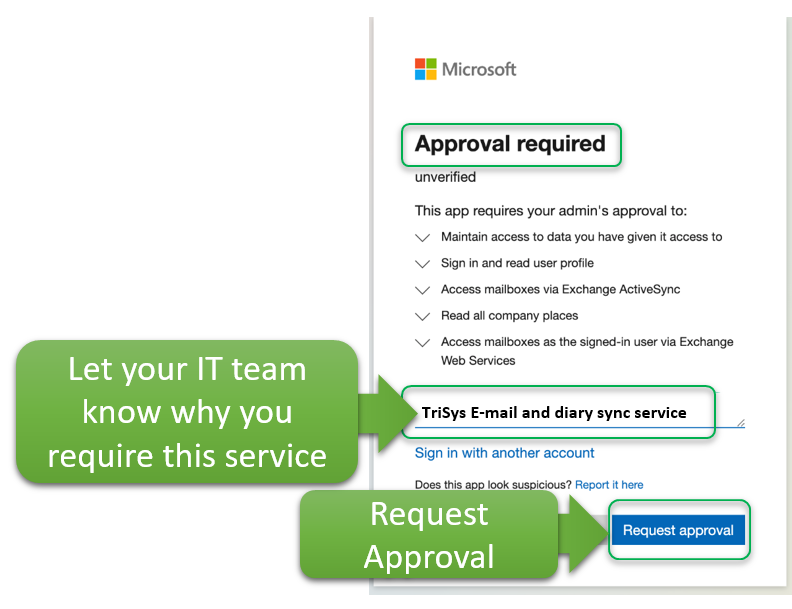
Should you see the message below, this means your Office365 IT Support team have not configured your Office365 service to allow user self-service E-Mail and Diary synchronisation. Please click "Request Approval" however please note you should at this point contact your Office365 IT Support team asking them to allow the requested permission below. You will be unable to proceed further until your Office365 IT Support team have granted you the relevant permission, at which point you will need to repeat the steps from the very start of this instruction page.
Important: the synchronisation service will only work should your Work E-Mail configured on your TriSys database User contact record match that which you are using above to login to your Microsoft 365 service. Should these not match, the synchronisation will not be allowed to occur (this is because TriSys synchronises e-mails which you send/receive from your company work e-mail address which should always match the work e-mail address on your TriSys user contact record).


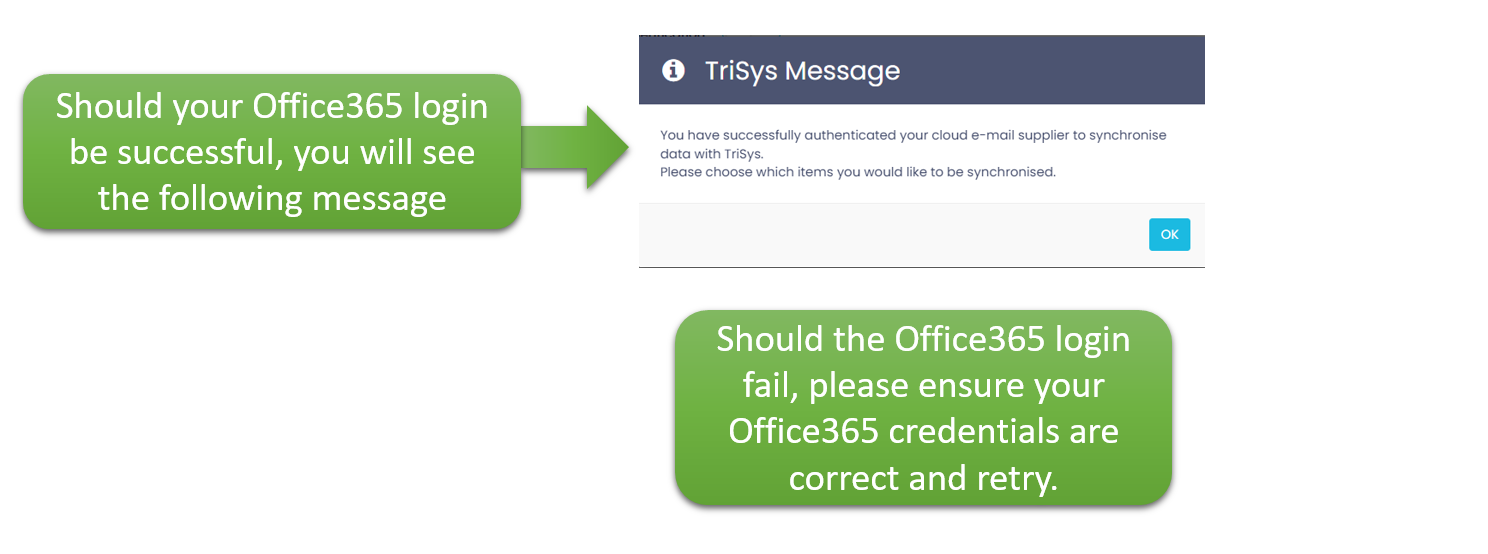
Once you have successfully configured the new synchronisation service, you will receive an e-mail confirming the service is active.

